
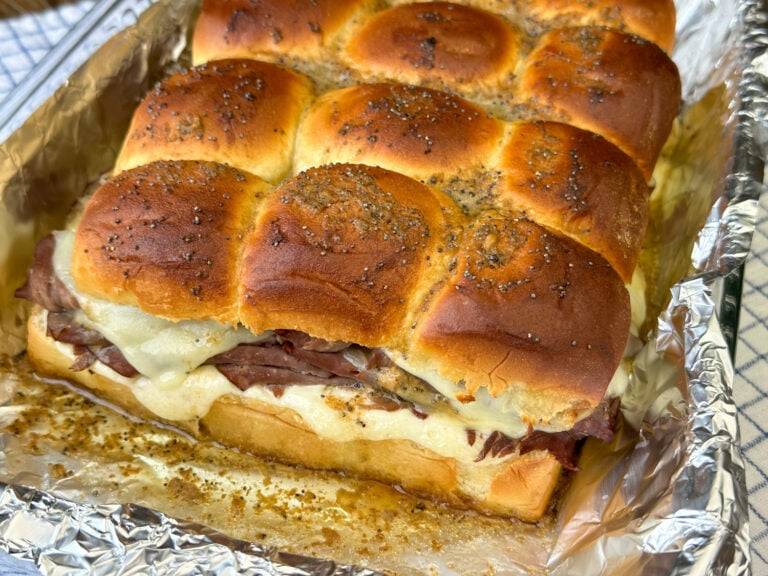
 Here’s another leftover prime rib idea. Happy Friday! Prime Rib Sliders Slices of leftover prime rib1 package King’s Hawaiian Rolls12 slices Swiss cheeseOnion powderGarlic powderMelted butter, for topping rolls Caramelized Onions:4 large sweet onions halved and cut thinly1/4 cup butterKosher salt and fresh-ground pepper, to taste4 tbsp balsamic vinegar4 tbsp brown sugar6 fresh rosemary stems2 bay leaves Horseradish Cream Sauce:2 tbsp prepared horseradish1/4 cup sour cream2 tsp Worcestershire sauce2 tsp Sriracha Caramelized Onions:Cut the onions in half, then slice them thinly.Melt the butter in a large skillet, then add the onions.Cook over low-medium heat until the onions are softened. About 20 minutes.Then add the rosemary stems and bay leaves. Mix. Cook for about 20 more minutes, until the rosemary has wilted.Once the rosemary has wilted, remove it and the bay leaves. You will likely have to remove stray rosemary leaves.Stir in the balsamic vinegar, sugar, salt and pepper.Continue cooking until the liquid is all gone, and the onions are caramel colored and soft. Be very careful not to burn the mixture, so stir often. Horseradish Cream Sauce:Combine the horseradish, sour cream, Worcestershire sauce and Sriracha. I like to use a hand blender to make the sauce nice and creamy. Putting it all together:Pre-heat your oven to 350Cut the entire pack of rolls in half horizontally, keeping each half intact and connected. Place the bottom half of the rolls on a foil lined baking sheet. Top with the roast beef (about 1 slice per roll). Dollop the beef with the horseradish cream sauce. Spread the onions in an even layer over the top, then top with the cheese. Place the top layer of rolls over the cheese. Brush the top of the rolls with the melted butter. Sprinkle with the garlic powder and onion powder.Cover the baking sheet with aluminum foil and bake for 15 minutes. Uncover and bake until the cheese is melted and the rolls are lightly browned, 5 to 7 minutes more. Let cool for 5 minutes before serving.
Category: Dave’s Blog
-
Prime Rib Sliders
Here’s another leftover prime rib idea. Happy Friday! Prime Rib Sliders Slices of leftover prime rib1 package King’s Hawaiian Rolls12 slices Swiss cheeseOnion powderGarlic powderMelted butter, for topping rolls Caramelized Onions:4 large sweet onions halved and cut thinly1/4 cup butterKosher salt and fresh-ground pepper, to taste4 tbsp balsamic vinegar4 tbsp brown sugar6 fresh rosemary stems2 bay leaves Horseradish Cream Sauce:2 tbsp prepared horseradish1/4 cup sour cream2 tsp Worcestershire sauce2 tsp Sriracha Caramelized Onions:Cut the onions in half, then slice them thinly.Melt the butter in a large skillet, then add the onions.Cook over low-medium heat until the onions are softened. About 20 minutes.Then add the rosemary stems and bay leaves. Mix. Cook for about 20 more minutes, until the rosemary has wilted.Once the rosemary has wilted, remove it and the bay leaves. You will likely have to remove stray rosemary leaves.Stir in the balsamic vinegar, sugar, salt and pepper.Continue cooking until the liquid is all gone, and the onions are caramel colored and soft. Be very careful not to burn the mixture, so stir often. Horseradish Cream Sauce:Combine the horseradish, sour cream, Worcestershire sauce and Sriracha. I like to use a hand blender to make the sauce nice and creamy. Putting it all together:Pre-heat your oven to 350Cut the entire pack of rolls in half horizontally, keeping each half intact and connected. Place the bottom half of the rolls on a foil lined baking sheet. Top with the roast beef (about 1 slice per roll). Dollop the beef with the horseradish cream sauce. Spread the onions in an even layer over the top, then top with the cheese. Place the top layer of rolls over the cheese. Brush the top of the rolls with the melted butter. Sprinkle with the garlic powder and onion powder.Cover the baking sheet with aluminum foil and bake for 15 minutes. Uncover and bake until the cheese is melted and the rolls are lightly browned, 5 to 7 minutes more. Let cool for 5 minutes before serving. -
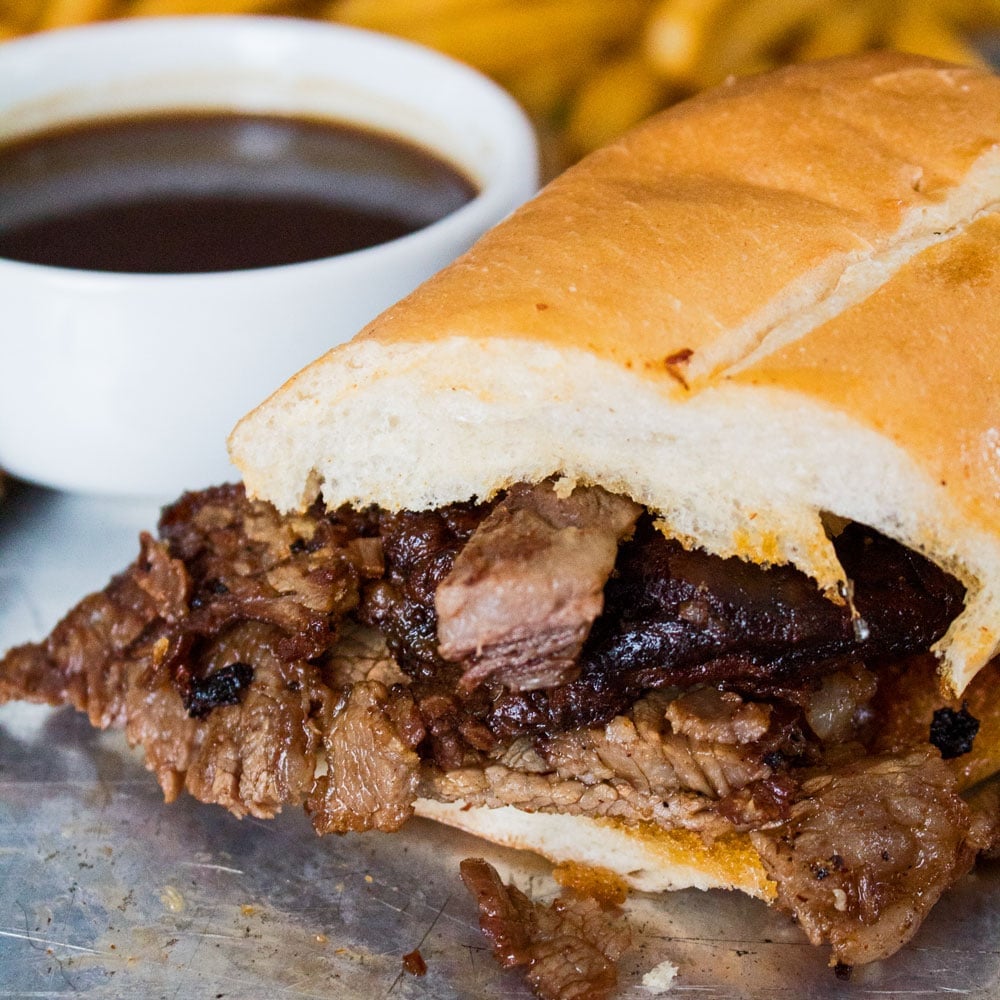
Leftover Prime Rib Dips with Red Wine Au Jus
What to do with that leftover prime rib…Leftover Prime Rib Dips with Red Wine Au JusIngredients for 8 sandwiches6 cups leftover prime rib red wine au jus (recipe below)2 tablespoons olive oil3 lb. leftover prime rib roast (thin sliced for sandwiches)Kosher salt and fresh ground pepper, to taste2 tablespoons butter8 sandwich rolls (hoagie or torpedo rolls) buttered and toasted16 slices Swiss cheese (optional)In a saucepan, bring leftover prime rib au jus to medium temperature.In a large skillet or frying pan, add olive oil and bring to medium high heat. Add sliced leftover prime rib beef and season with course ground salt and pepper. Cook until warmed, about 4-5 minutes.Ladle about ½ cup portion of the au jus into the pan, and add the tablespoon of butter.If you are putting cheese on the sandwiches, build the sandwiches (open faced) with the meat and cheese and put under the broiler, just until the cheese is melted. Otherwise, just build with the warmed meat and enjoy!Serve with ramekins or cups filled with the red wine au jus.Red Wine Au Jus4 cups beef broth2 cups cabernet sauvignon (or your choice red wine)1 cup prime rib roast drippings4 tablespoons unsalted butter2 sprigs fresh rosemary2 pinches ground sageKosher salt and fresh ground pepper, to tasteCombine all ingredients in a medium saucepan and bring to a rolling boil at medium high heat. Reduce heat to low and allow to simmer for 10 minutes, taste and simmer for an additional 5-10 minutes if you would like a stronger au jus.Do not reduce the au jus too much, as it should be a thinner sauce than gravy. Add salt & pepper, to taste. Strain and serve in individual bowls for each of your guests (save the leftover au jus for sandwiches tomorrow!). -
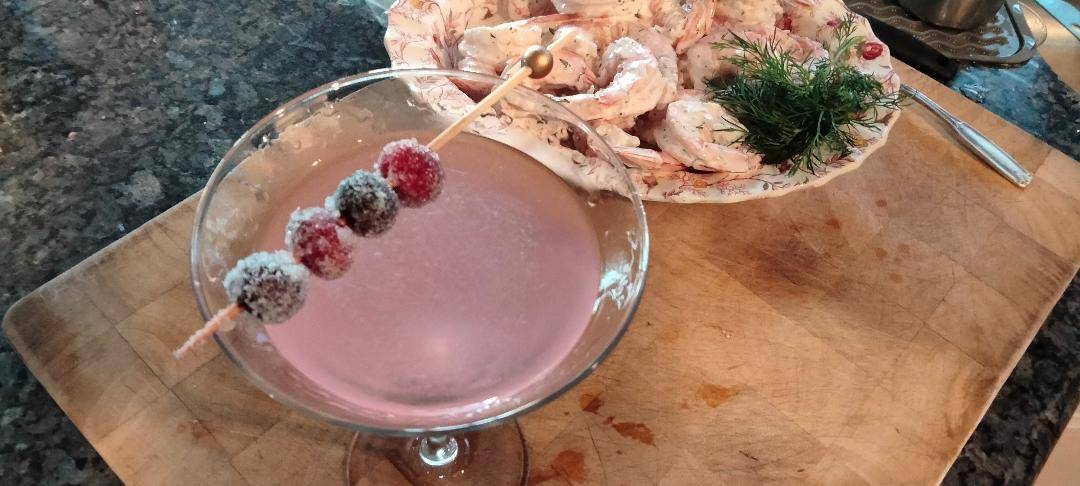
Nana’s Shrimp Appetizer
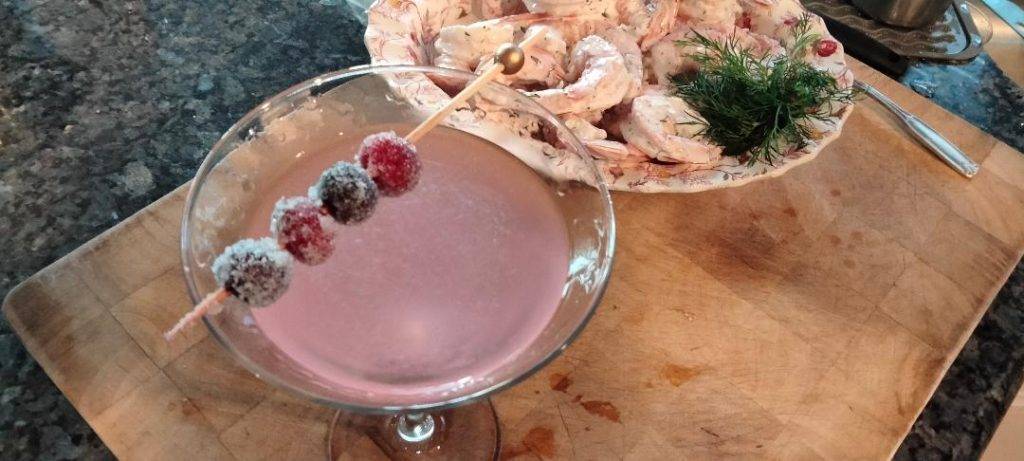 This shrimp appetizer is a game-changer. I first had this 2 years ago, when we spent Christmas in Santa Barbara. My sister-in-law, Kathy, made this from her grandmother’s recipe. Beth has the same grandmother. Beth and I have been married nearly 35 years. Why is it, I first learned of this masterpiece just 2 years ago? As always, Beth has been holding out on me. Merry Christmas & Happy New Year!Nana’s Shrimp Appetizer2/3 cup mayonnaise2 tablespoons heavy cream2 tablespoons tarragon vinegar2 tablespoons chopped fresh parsley2 tablespoons minced onion½ teaspoon celery seed½ teaspoon sweet basil½ teaspoon salt½ teaspoon black pepperMix together—pour over 2-3 pounds jumbo cooked shrimp. Marinate in the fridge. Serve on toothpicks and enjoy with your favorite cocktail. Or this can be used as a salad too —serve with dark greens, avocado, etc.
-

TJ’s Teriyaki Rumaki
 Our very dear friend Teresa, who sadly passed too soon several years ago, used to make the best Rumaki for our Christmas and New Year’s parties. Now, her husband and our dear friend, John, is with her. It’s a great party snack for the holidays and brings us great memories. Rest easy John & TJ.TJ’s Teriyaki Rumaki1 container chicken liver1lb bacon1⁄2 cup Teriyaki sauce1 tablespoon fresh, minced ginger (about 1 inch knob)1⁄4 cup cream sherry1 (4 ounce) can sliced water chestnuts1 clove minced garlicButterWooden toothpicksPlace bacon strips in a cold frying pan. Turn on a low flame and slowly render the fat from the bacon.Melt some butter or margarine, and add the teriyaki sauce, ginger, sherry and garlic in another frying pan with a container of chicken livers on a medium flame.DO NOT ALLOW THE BACON TO GET FULLY DONE, ONLY PARTIALLY DONE.While bacon is still soft and only partially done, remove and place strips onto a paper towel to slightly cool.When livers are done on both sides, remove from flame and also set aside onto paper towel to slightly cool.Slice the chicken livers into 1/2-inch pieces.Take a piece of chicken liver and a slice of water chestnut and wrap either 1/2 strip of bacon or a whole strip of bacon around the liver and water chestnut, securing it with a wooden toothpick.Place the Rumaki onto a cookie sheet, and continue this same procedure, until the cookie sheet is filled and the livers and bacon are gone.Set the cookie sheet with all of the Rumaki aside.About 20 minutes before company arrives, preheat oven to 450 degrees.About 15 minutes before company arrives, place the cookie sheet with the Rumaki into the oven for 10 minutes, and then raise the oven to broil for about 3 to 5 minutes.Remove from oven and serve on a hot plate.Leave the toothpicks in place so they can pick it up by the toothpicks.
-
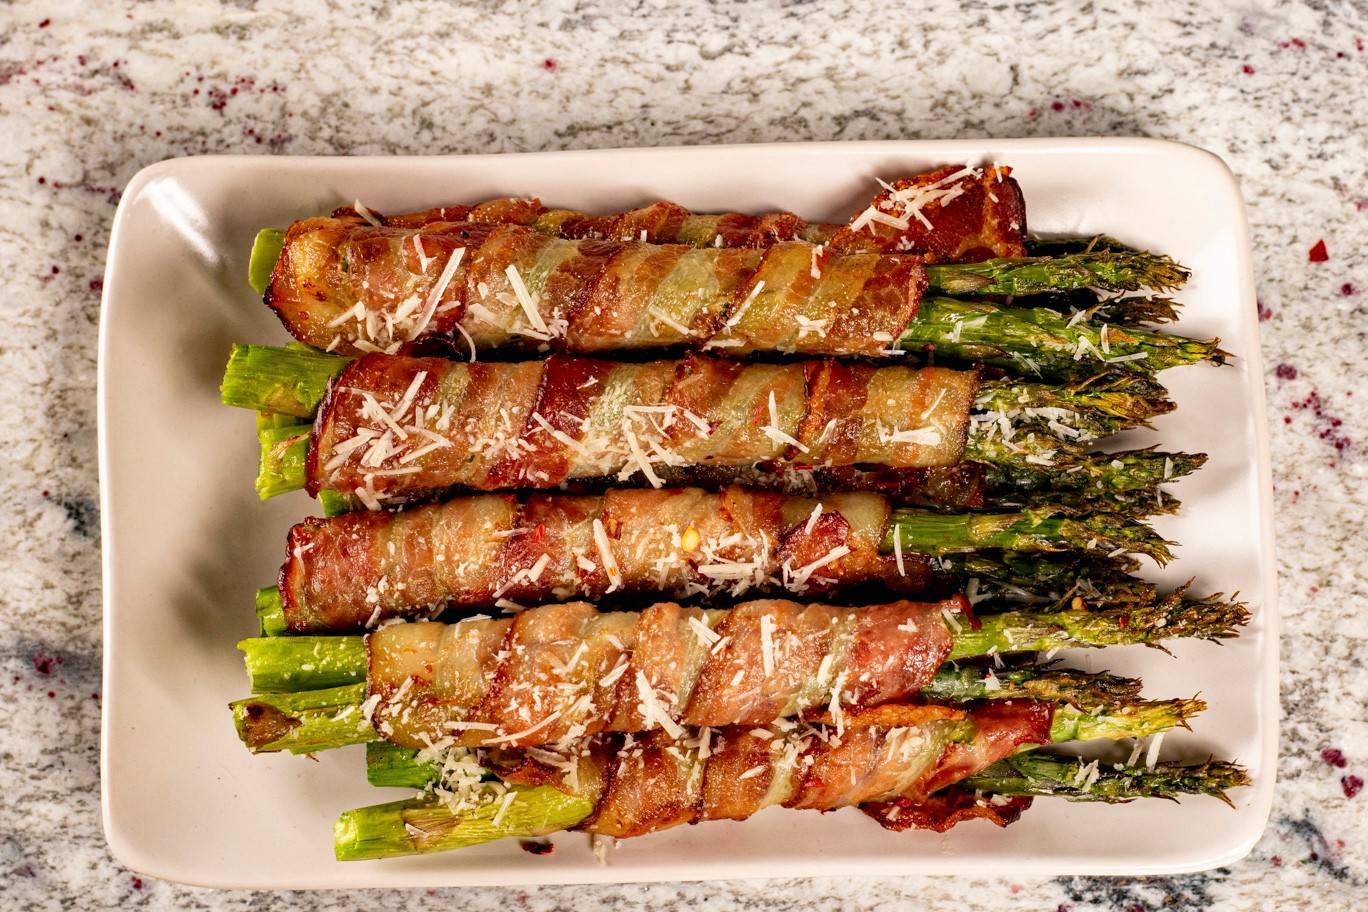
Garlic-Parmesan Bacon Wrapped Asparagus
Here’s a side for my surf n turf dinner. It’s a good lookin’ side, it’s delicious and it makes your pee smell funny! Garlic-Parmesan Bacon Wrapped Asparagus 2 lb asparagus cleaned, woody ends removed1 stick unsalted butter2 tbsp minced garlic1 lb thin-sliced bacon½ cup finely grated Parmesan cheeseRed pepper flakes, to tasteKosher salt and fresh-ground pepper, to taste Preheat the oven to 425°F.In a saucepan, melt the butter with the minced garlic.Brush the asparagus spears lightly with the melted Garlic Butter.Bundle the asparagus in three’s. Wrap a slice of bacon around the stems. Repeat with the remaining spears and bacon.Place into the oven and bake 20-25 minutes, depending on how thick the asparagus is, turning halfway through cooking.Increase oven temperature to broil and cook an additional 3 minutes to crisp up the bacon.Remove from oven and sprinkle with Parmesan cheese and red pepper flakes. Salt and pepper, to taste. -
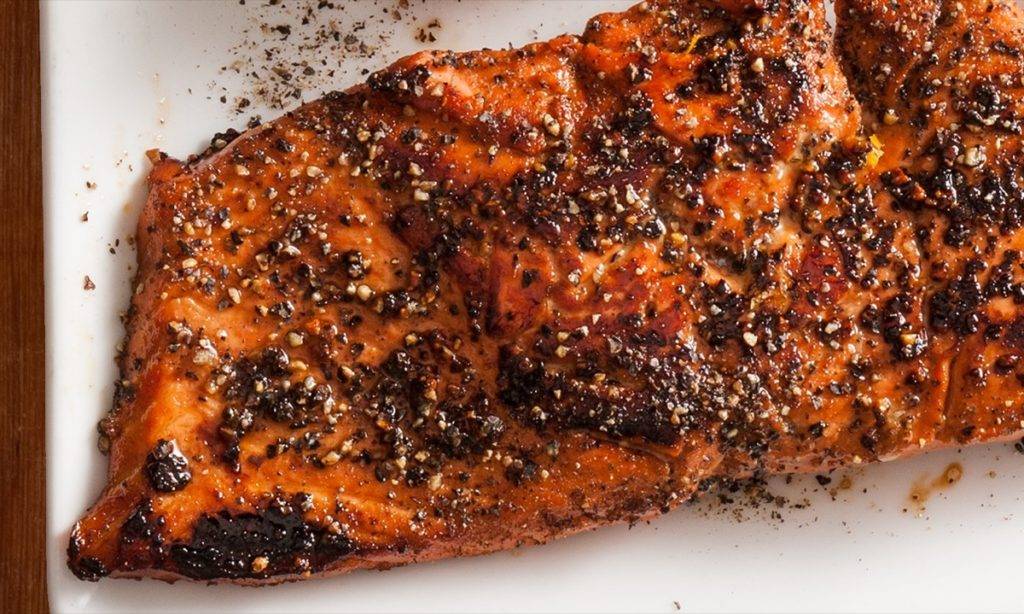
Peppered Salmon and Creamed Corn
Dodgers and Padres tonight. Who’s going to the NLCS? Peppered Salmon and Creamed Corn FOR THE SALMON4 tablespoons soy sauce2 garlic cloves, mashed to a paste4 teaspoons lemon juice2 teaspoons sugarFour 6-ounces salmon fillets, skinless2 tablespoons black pepper3 tablespoons olive oil FOR THE CREAMED CORN AND BELL PEPPER3 cups frozen corn kernel2 tablespoons olive oil1 cup red bell pepper, finely chopped6 tablespoons heavy creamSalt and pepper, for seasoning In a sealable plastic bag combine well the soy sauce, garlic, lemon juice and the sugar, and add the salmon to it coating it well. Let it marinate sealed and chilled for 30 minutes.Meanwhile, in a heavy skillet cook the corn in the oil over high heat, stirring for 3 minutes. Add the bell peppers and cook the mixture stirring for another 4-5 minutes until the vegetables are tender. Add the cream, and season with salt and pepper to taste. Simmer until the cream is evaporated.Remove the salmon from the bag, discard the marinade, pat it dry and press the ground black pepper onto each piece of salmon, coating thoroughly.In a large skillet heat the 3 tablespoons olive oil over moderately high heat until hot but not smoking and sauté the salmon in it for 2 minutes on each side, or until it flakes.Transfer to a plate and serve the corn around it. -
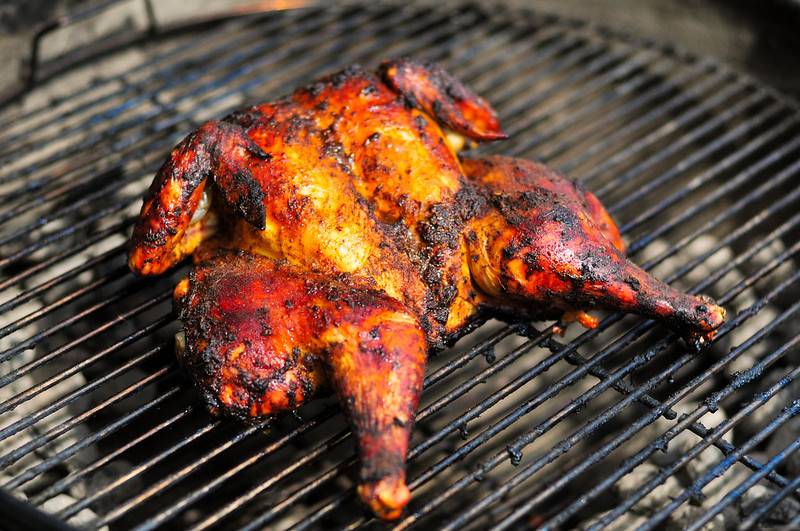
Spatchcocked Mexican Roadhouse Chicken with Roasted Tomatillo Salsa and Roasted Green Onions
Spatchcock is both a noun and verb. Noun…a chicken split open is a spatchcocked chicken.”That is a good lookin’ spatchcocked chicken!” Verb…to split open a chicken, to prepare it for grilling.”We need to spatchcock these chickens.” However you use it, it’s just fun to say! Spatchcocked Mexican Roadhouse Chicken with Roasted Tomatillo Salsa and Roasted Green Onions The rub:1 1/2 teaspoons ground ancho Chile powder1 teaspoon dried oregano, preferably MexicanA big pinch of ground cloves1/2 teaspoon of ground cinnamon2 garlic cloves, peeled and finely chopped or crushed through a garlic press3 tablespoons apple cider vinegar1/4 cup fresh orange juice1 teaspoon Kosher salt, plus a little more for the onions1 large, whole chicken2 large bunches of green onions or knob onionsA little olive oil for brushing the onionsGrilled tomatillo salsa, for serving, recipe follows Place one whole chicken, breast side down, on a cutting board.Remove the Backbone. Starting at thigh end, cut along one side of backbone with kitchen shears.Continue to Remove the Backbone. Turn chicken around; cut along other side of the backbone. Discard the backbone.Turn the chicken over, breast side up. Apply pressure and flatten the chicken. The spatchcocked chicken is now ready to be prepared for grilling.Light a chimney 3/4 full of charcoal. While the charcoal is lighting, mix Chile powder, oregano, cloves, cinnamon, garlic, vinegar, orange juice, and 1 teaspoon of salt together in a small bowl.When the charcoal is fully lit and covered in gray ash, pour coals out and arrange them on one side of the charcoal grate, keeping the other side empty. Alternatively, set all the burners of a gas grill to high heat. Set cooking grate in place, cover grill, and allow to preheat for 5 minutes. Clean and oil grilling grate.Place the chicken over the cool side of the grill, skin side down, and brush exposed side with the wet rub. Flip the chicken over and brush the other side with the rub. Cover the grill and cook, basting occasionally with any remaining rub, at 350 degrees until an digital thermometer reads 165 degrees when inserted into the thickest part of the breast, about 45 minutes. Remove the chicken from the grill and allow to rest for 10 to 15 minutes.While the chicken is resting, brush the onions with olive oil and season with salt. Place the onions over the hot side of the grill and cook until tender and browned, about 5 minutes per side.To serve, cut the chicken into quarters, top with green onions and tomatillo salsa. Roasted Tomatillo Salsa1/2 lb. husked, rinsed, and halved tomatillos2 large cloves garlic, peeled1 jalapeño or 2 serrano chiles, stemmed and roughly chopped1/3 cup (loosely packed) roughly chopped cilantro1/2 small white onion, finely chopped1/4 cup waterSugarSalt Light one chimney full of charcoal. When all the charcoal is lit and covered with gray ash, pour out and spread coals out evenly over the charcoal grate. Alternatively, set all the burners of a gas grill to high heat. Set cooking grate in place, cover grill, and allow to preheat for 5 minutes. Clean and oil grilling grate.Place tomatillo halves on the grill, cut side down. Grill until browned and they begin to soften. Flip and continue to cook until completely softened. Remove the tomatillos to the work bowl of a blender or food processor. Let cool to room temperature.Add garlic, chiles, cilantro, and 1/4 cup of water to the bowl and pulse until coarsely pureed. Pour salsa into a small dish and stir in the onion. Thin the salsa out with more water if necessary. Taste and add sugar to if the salsa is too tart. Season with salt to taste. -
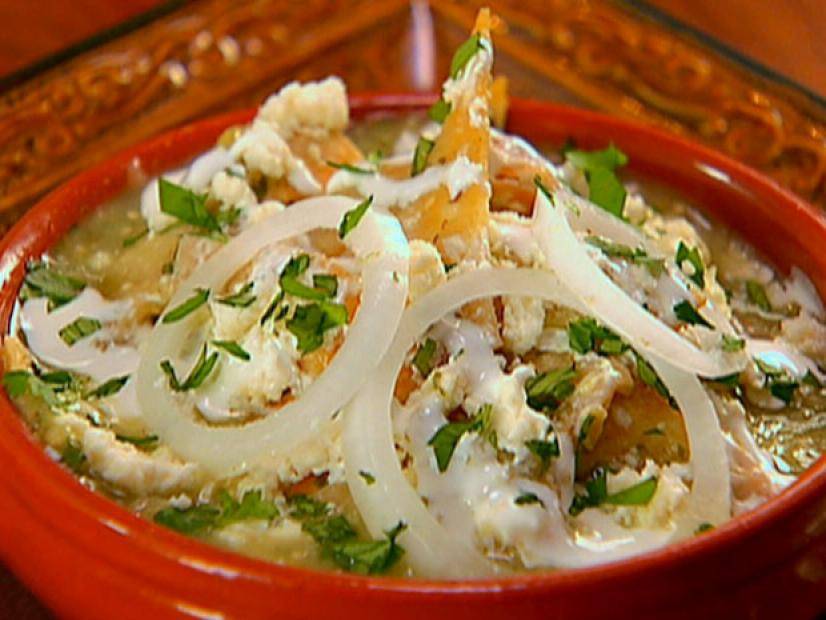
Chilaquiles with Roasted Tomatillo Salsa
Why wouldn’t I? Chilaquiles with Roasted Tomatillo Salsa Tomatillo Salsa1 pound fresh tomatillos3 fresh serrano chiles3 garlic cloves, unpeeled1 large onion, coarsely choppedOlive oil, as neededKosher salt and fresh ground black pepper, to taste1/2 cup fresh cilantro leaves1/4 cup chicken broth, or more as needed Chilaquiles1/3 cup vegetable oil12 corn tortillas, preferably stale, cut into 6 wedges.3 cups roasted Tomatillo SalsaKosher salt and fresh ground black pepper, to taste1/2 cup crumbled queso fresco2 thin slices onion, separated into rings1/2 cup Mexican crema, creme fraiche or sour cream1/4 cup chopped fresh cilantro leaves, for garnish To make the salsa:Preheat the broiler or oven to 550 degrees F.Remove husks from the tomatillos and rinse under warm water to remove the stickiness. Put the chiles, garlic, onion and tomatillos on a baking sheet. Season with a little olive oil, and salt and pepper, to taste. Put on a rack about 1 or 2 inches from the heat, and cook, turning the vegetables once, until softened and slightly charred, about 5 to 7 minutes. When cool enough to handle, peel the garlic and pull off the tops of the chiles. Add all the broiled ingredients to a blender along with the fresh cilantro and puree. Pour in 1/4 cup of chicken broth and blend to combine. Add more broth, if needed, for desired consistency. To make the chilaquiles:Pour about 1/3 cup vegetable oil into a large sauté pan over medium heat. When the oil is hot, add the tortillas, working in 2 or 3 batches, and cook until lightly browned and nearly crisp. Drain the tortillas on paper towels and discard the remaining oil. Wipe the pan with a paper towel.In the same pan, add the tomatillo salsa and bring to simmer over low heat. Add the tortillas and cook until soft but not mushy, about 5 minutes. Season with salt and pepper, to taste. Divide the mixture among 4 individual casserole dishes. Top with the cheese crumbles and onion rings. Drizzle with Mexican crema, sprinkle with some chopped fresh cilantro and serve immediately. -

Nina Montijo’s Chile Rellenos with Salsa Roja
When I was a kid growing up in Nyeland Acres (near Oxnard, CA), I had the great fortune of living next door to Nina Montijo, who would look after me between the time I got out of school and my mom and dad got home from work. She was an amazing cook. Recently, I found her recipe for Chile rellenos. I’ve updated a few things and some of the terminology. Happy Taco Tuesday! Nina Montijo’s Chile Rellenos with Salsa Roja 8 poblano chiles1 batch red sauce or salsa Roja (recipe follows)4 cups grated Monterey Jack cheese4 eggs, separated1/2 cup all-purpose flourVegetable oil, for frying To prepare the poblano chiles:Place chiles directly over the open flame. I prefer to broil them. Turn them every 2 to 3 minutes for a total of 6 to 9 minutes. They must seem charred and blistered on the outside, while the flesh must be cooked but not burnt. Place them immediately in a plastic bag, close it tightly and let them sweat for 10 to 20 minutes. Lastly, under a thin stream of cold water, remove the charred skin, which should come right off. Set each on aside.Make a slit down one side of the pepper and remove the cluster of seeds and veins. Once cleaned, pat them dry.Stuff each of the poblano chiles with about 1/2 cup grated cheese, or as much as will fit, allowing them to close. Seal with a toothpick. Place 1/2 cup flour on a plate, roll the stuffed chiles in the flour and let them sit. The flour coating will help the batter coat and stay on the chiles. To prepare the batter:In a mixer, beat the egg whites until they hold stiff peaks. Gently, on low speed, fold in the egg yolks and only beat enough so that they are incorporated, a few seconds. To cook the chiles:In a large casserole, heat about 1/2-inch of oil over medium to medium-high heat. Once hot, test the oil, by dipping a teaspoon of batter into the oil; if there are active bubbles all around it, it’s ready. Dip each of the stuffed and floured chiles into the egg batter, making sure that they are entirely covered in batter.In batches, place them in the hot oil without overcrowding, trying to have the side that was open or sealed with the toothpick facing up. Spoon some of the hot oil on top, so that it will seal the Chile. Fry for about 2 minutes per side, flipping gently with a slotted spoon, until golden brown. Transfer to a paper-towel covered drying rack or platter. To serve:Heat the salsa Roja. Serve the chiles with a generous amount of salsa Roja spooned on top. You can also place the chiles in a casserole and top with the heated salsa Roja. Eat while hot and melty! Salsa Roja2 pounds ripe tomatoes2 garlic clovesOne 1-inch-thick slice of a large white onion, outer skin peeled offKosher salt and fresh ground pepper, to taste2 tablespoons vegetable oil1 cup chicken or vegetable brothPlace the tomatoes and garlic in a medium saucepan, cover with water and bring to a boil over medium-high heat. Reduce heat to medium and simmer for 10 to 15 minutes until the tomatoes are completely smooth, cooked and mushy.Place tomatoes and garlic in a blender along with the onion and salt, and process until completely smooth.Heat the oil in medium saucepan, set over medium heat. Once the oil is hot, pour in the sauce, cover with a lid partially and simmer for 5 to 6 minutes, stirring here and there. Add the chicken broth, stir and cook for another 6 to 8 minutes, until well-seasoned and lightly thickened. -

Garlic Fries
If you’re going to the Giants home opener on Friday, I strongly suggest the Gilroy Garlic Fries and a cold beer. If not, make your own. Garlic Fries 1 bag frozen French fries¼ cup vegetable or canola oil4 cloves fresh garlic, minced or 4 teaspoons jarred, minced garlic1 tablespoon dried or fresh parsley, finely chopped1 tablespoon dried rosemary¼ cup grated ParmesanGarlic salt, to taste Pre-heat your oven according to package directions.Line a baking sheet with heavy duty aluminum foil.Make sure the fries are nice and dry. I dump them out on a clean kitchen towel and pat dry them to remove any freezer ice.Cook the fries according to package directions. Cook a bit longer than suggested time to get a nice golden color.While the fries are cooking, mix the oil, garlic, parsley, rosemary, Parmesan and garlic salt in a bowl. Set aside.When the fries are done, dump them in a large bowl and mix in your oil mixture.